Loading Custom OpenStreetMap Data into OpenMapTiles:
Background
After a great workshop by Rob Chohan at State of the Map US 2017 in Boulder, CO on using OpenMapTiles, I decided to try it out myself. I am working on a new fun project that could use its own custom map, so it’s a great application of the new technology.
I have been following OpenMapTiles for a while, it was originally a project called OSM2VectorTiles which was based on a really well written thesis. I think I read the entire thesis over the course of a few train rides to and from NYC. It is really interesting, and I suggest reading it, if you’re interested in the internal structure of vector tiles. OpenMapTiles has gone through some iterations and become a mature product, and seems to be ready for production.
Goals
For my project I wanted to:
- Use a small extract from OpenStreetMap of my small town (which is not in the Mapzen metro extracts)
- Convert it to the “mbtiles” format
- Apply a simple style to the data
- Display the map
Tools
To run this, I highly suggest using Docker. If you’re on a Mac, you can run Docker directly on your computer. If you’re on Windows, I suggest using VirtualBox to run Ubuntu, and running Docker within that Virtual Machine.
The “Convert it to the ‘mbtiles’ format” step can take a long time depending on the extent, zoom levels, and the speed of your machine. I suggest keeping the area small and the MAX_ZOOM level at 14 (You can learn all about zoom levels here). If you have a need for a larger area or more detail, you can use Amazon web services, or just wait a long time.
Process
Get the small extract out of OpenStreetMap
- The first thing to decide is the bounding box of the area you want to use. I use bboxfinder to do this quickly
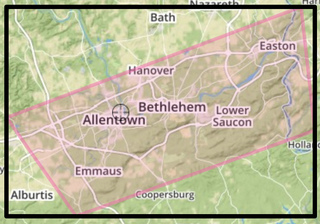
- Just draw the area that you would like to use, and bboxfinder will draw a box around it.
- Copy the coordinate list for “Box” in the lower left
- Just draw the area that you would like to use, and bboxfinder will draw a box around it.
- Download the data from OpenStreetMap.
- You can then use an XAPI server to download the extent of the bounding box from OpenStreetMap. There are a few good ways to download OpenStreetMap data that are described here. I have found the XAPI method to be the easiest. There is a lot of flexibility with the XAPI that is described in the XAPI docs, but for simplicity, I’m just going to download all of the OpenStreetMap data within my bounding box.
- I used the URL:
http://www.overpass-api.de/api/xapi_meta?*[bbox=-75.643616,40.484560,-75.150604,40.738933] - If you’re going to use curl to download the data, you need to use the -g parameter to prevent globbing. If globbing if left on (as it is by default), it will read the asterisk in the URL as a wildcard.
curl -g -o lehigh_valley.osm http://www.overpass-api.de/api/xapi_meta?*[bbox=-75.643616,40.484560,-75.150604,40.738933]
- Convert the OSM file to PBF format.
- Now we have the .osm file for the bounding box, it contains all current OpenStreetMap data within that extent. Unfortunately, the software that converts to mbtiles requires a .pbf file.
- This requires the use of a tool called Osmosis.
- Installation instructions are here.
- Make sure you have Java installed, since Osmosis requires it.
- Osmosis can also do a lot of filtering on the OSM file, but for simplicity I am just going to convert everything to the PBF format.
- I used the following command to convert my OSM file into the PBF format.
osmosis --read-xml lehigh_valley.osm --write-pbf lehigh_valley.osm.pbf
Convert the PBF file to mbtiles
This is where we finally get to use OpenMapTiles! I just followed the process here, but I wanted to add a few comments along the way.
- Clone the OpenMapTiles repo to your computer:
git clone git@github.com:openmaptiles/openmaptiles.git
- Change to the new openmaptiles directory
cd openmaptiles
- Run the make command in the Docker
(This is far easier and cleaning that installing it on your own machine)
docker run -v $(pwd):/tileset openmaptiles/openmaptiles-tools make
- Bring up the database
(the -d puts it in detached mode, this way it runs in the background)
docker-compose up -d postgres
- Import the external data needed to create the map
(I had originally tried this without importing everything, and it ended up being a pain, so I would suggest loading all four datasets)
docker-compose run import-waterdocker-compose run import-natural-earthdocker-compose run import-lakelinesdocker-compose run import-osmborder
- Copy your PBF File into the data directory
(Your command will probably be different)
cp ../lehigh_valley.osm.pbf ./data
- Update the .env file
(Update the following lines, you will want to use your own BBOX, which is the same as the one obtained from bboxfinder)
BBOX=-75.643616,40.484560,-75.150604,40.738933MIN_ZOOM=0MAX_ZOOM=14
- Import the default mapping rules
docker-compose run import-osm
- Create the Vector Tiles!
(This long command also refreshes everything, so if you make any changes it will pick them up)
make clean &&\ docker run -v $(pwd):/tileset openmaptiles/openmaptiles-tools make &&\ docker-compose run import-sql &&\ docker-compose run generate-vectortiles- This process took me about two hours (although it estimated 3), so I would suggest taking a break at this point.
- As I suggested before, try limiting your bounding box or MAX_ZOOM if you want faster tiles. You can also use a faster computer, such as an EC2 machine from Amazon Web Services.
- When this process is done, you should have a tiles.mbtiles file in your data directory
Load a style
Since we are making a raster map, we need to use a tm2 style. OpenMapTiles has ported a few predefined styles over for us to use here.
- Change to the data directory
cd data
- Clone one of the predefined styles into the data directory
git clone https://github.com/openmaptiles/mapbox-studio-osm-bright.tm2.git
- Edit the project.yml file
- Should be at
./mapbox-studio-osm-bright.tm2.git/project.yml - Update the source to be your new tiles.mbtiles file by changing the line
- from
source: "http://openmaptiles.org/cdn.json" - to
source: "mbtiles:///data/tiles.mbtiles"Create the map
- from
- Should be at
- Change back to the root directory for openmaptiles
cd ..
- Run the following command
docker run --rm -it -v $(pwd)/data:/data -p 8000:80 klokantech/tileserver-mapnik
- Navigate to:
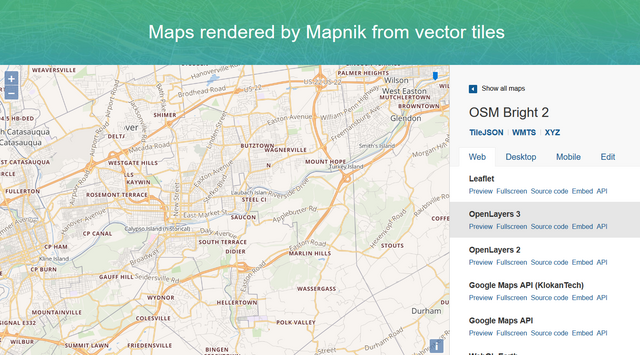
http://localhost:8000 - Click on the OSM Bright 2 layer to see your raster data
- After you zoom to the location it should look like this:

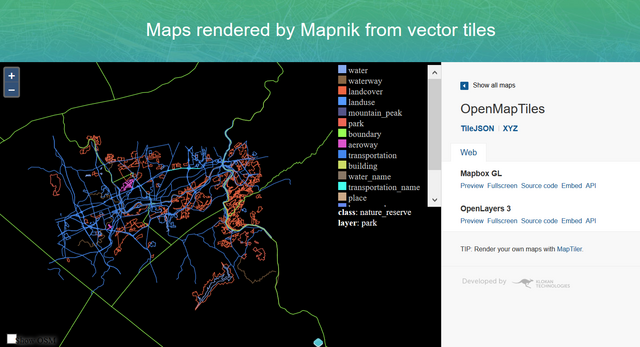
- You can also look at the Vector Tiles

- I had trouble with the Mapbox GL layer, but OpenLayers 3 worked well


